Tag Archives: pleats

(Almost) Maxi Dress

Hi!

I’ve wanted to make a maxi dress for a really long time, but haven’t been able to think up/find a pattern that would suit my needs. Simple, but not plain, neat, but not too festive, relaxed, but not too hippy-ie. Sometimes I’m hard to please. But finally, sitting on the couch at home, watching whatever, I came up with this simple dress with a pleated bodice, and knew that that was the one. Luckily I also found a half linen, half cotton bedsheet from the flee market for around 2 € to make it from, so all was good. Unfortunately I was so busy before leaving for the US that I didn’t even have time to take photos of said dress. But here it is now, complete with sunny California! Yay!

front

The skirt is a simple flared thing, nothing special. It was supposed to be full-maxi but I ran out of fabric. Oops.

back

The straps are tied at the back via two small loops, so they are easy to adjust in case they start stretching.

detail

The pleated bodice is lined with a plain version of the same pattern, but some of the pleats still stretch annoyingly, so I’ll have to do some sneaky stitches in there somewhere when I’m bothered enough.


It’s strange to look at these sunny and summery pics when Autumn is already well on the way here in Helsinki. Even though I’m not really a summer person (possibly weird?) I almost miss the sweltering heat of the sun in San Diego when I see it in photos.


– Sadie


Tagged , , , , , ,

Pleated Skirt

Long time, no post.

I’ve been working full time for a while now, so I haven’t bothered with much sewing/blogging related activities, hence the unintentional break.

But now I’m a part-timer again, so I’ll have time for super-sewing again. Hooray for that!

The Skirt

This is my grumpy fashion model face!

I made this skirt a long time ago, but due to work and other things (read: laziness), Boyfriend and I only took pics of it a few days ago.

It’s made from the same fabric as the Rectangle Skirt in my last post.

I used pattern 121 from Burdastyle 7/07. I like how this pattern sort of puts a twist on the traditional pleated skirt by being asymmetrical with both the pleats and the top-stitching.

Contrary to the instructions I top-stitched all the pleats at the top, since the one that was supposed to be left unstitched refused to stay in place nicely (which tends to happen when you put a relatively tight pleated skirt on a figure that doesn’t resemble a stick).

I also made a petersham belt-thing that closes with a few hooks and eyes, since the ribbon I bought was far too stiff to be tied without looking all weird.

This skirt was also another success story for the invisible zipper foot, which I’ve totally fallen in love with. I added three crocheted belt loops to the skirt to hold the petersham in place, just to keep the option of wearing it without a belt.

My odd but awesome jellyshoes!


Tagged , , , , ,

Salmon Coloured Shirt Tutorial

In my first ever blog post, I had a couple of self-drafted shirts that people seemed to like. So I will attempt to explain how you can make one yourself.


Patterns

Start with the back piece, as the front piece is almost identical to it.


There’s only one real body measurement that you’ll need for this shirt, and that’s your hip measurement. Everything else depends on your personal preferences. I’ll use my own measurements as an example.

– Start by dividing your hip measurement in four. If you want a looser shirt, you can use a measurement slightly larger than your hip. Draw a straight line with that measurement on whatever paper you choose to make your patterns out of. My line was 25 cm (9,8″).

– Next, decide what length you want you shirt to be. this is probably best decided by measuring from your armpit, so basically from where the armhole would start. My shirt was 41 cm (~ 16″) long measured like this. Now draw this line from your first line like in the diagram above.

– Next decide your back length. This will probably depend a bit on how long your back is, but then again the shirt is quite loose, so I wouldn’t worry too much. My back length was exactly 20 cm longer than the measurement from the armpit, so that’s 61 cm (24″) long in total.

– Decide how wide you want your neckline and sleeve to be. My neckline was like a boatneck, so it was 30 cm (11,8″) wide, so that’s 15 cm (5,9″) on the pattern. Draw it so that it curves upwards slightly, the starting point of the sleeve being about 2 cm (~0,8″) higher than where the back line ended. Next draw the sleeve. My sleeve was 18 cm (7″) wide. The line is completely straight, parallel with the “1/4 of hip” -line. Now just draw a slightly curved line from where the sleeve ends to where your “shirt length from armpit” -line begins. Your pattern for the back piece of the shirt is now finished, and hopefully looks something like the diagram above.


Next, the front piece:

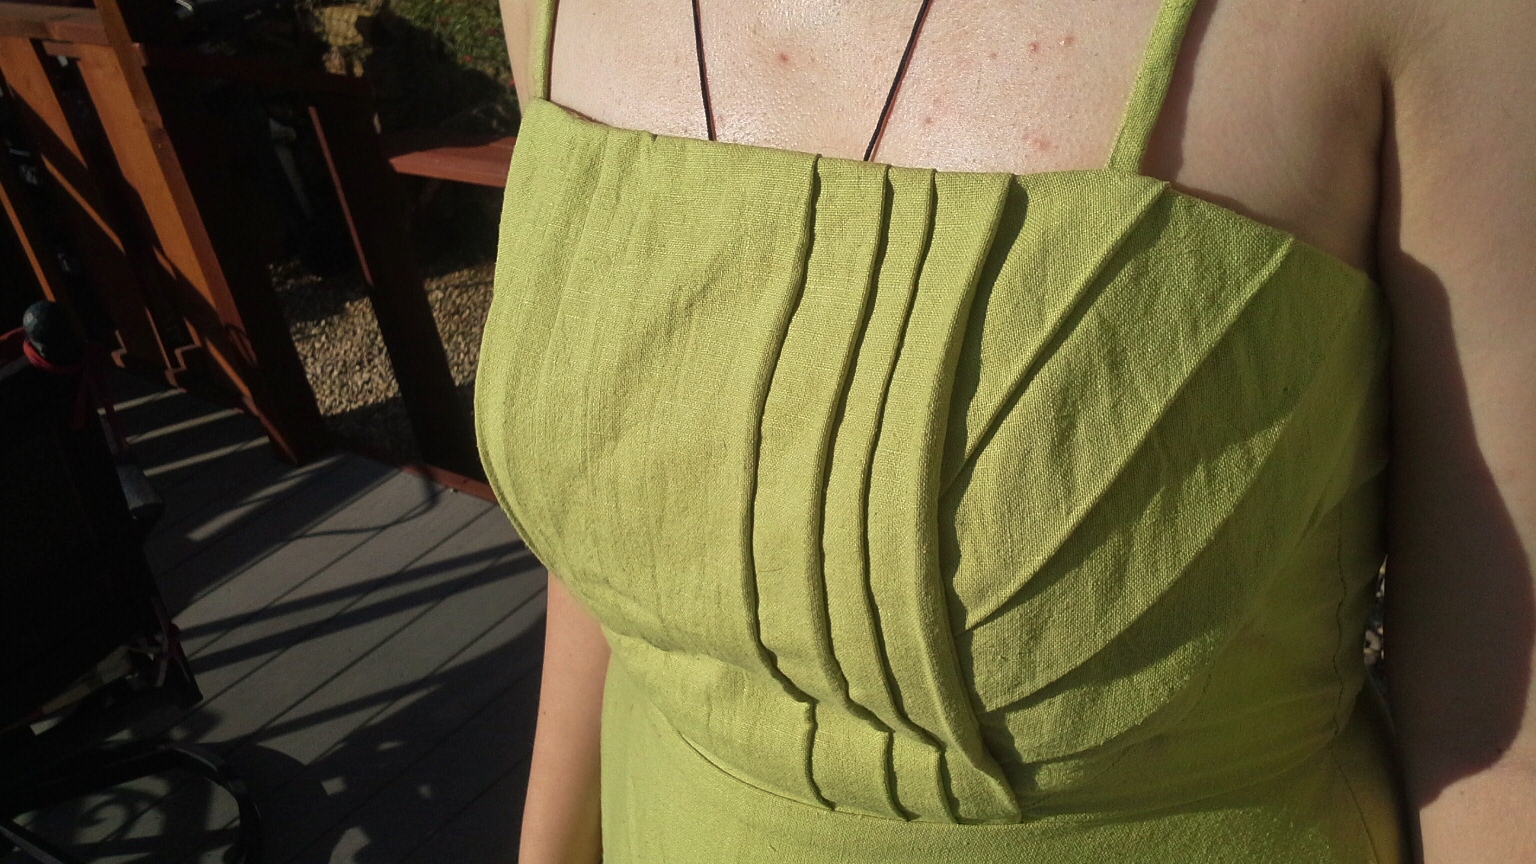
– All the measurements except the back length are the same as in the pattern for the back piece. So basically you can copy the back piece up until the armpit, then add four times your desired pleat-width to you original back length. Draw this line, and copy the top of the pattern from the back piece. Now draw a line connecting the sleeve to the armpit, and your done. My pleats were 2 cm (~0,8″) wide, so the center front of my front piece is exactly 8 cm (~3,1″) longer than the center back of my back piece. Mark your pleats according to the diagram, where the …… -lines mark the peak of the pleat, and the _ . _ . _ -lines are the ones that should be sewn together, as shown by the arrows in the diagram.

Construction

After finishing  off the edges of the two pieces, start constructing the shirt by making the pleats. It’s probably easiest to pin them down and iron them before sewing. Remember not to sew the pleats all the way! The sleeves should be left pretty much open, so only sew the center portions, which is approximately the width of the neckline + 3 cm (~1,2″) on both sides. When you’re done with the pleats they should look something like this from the inside:

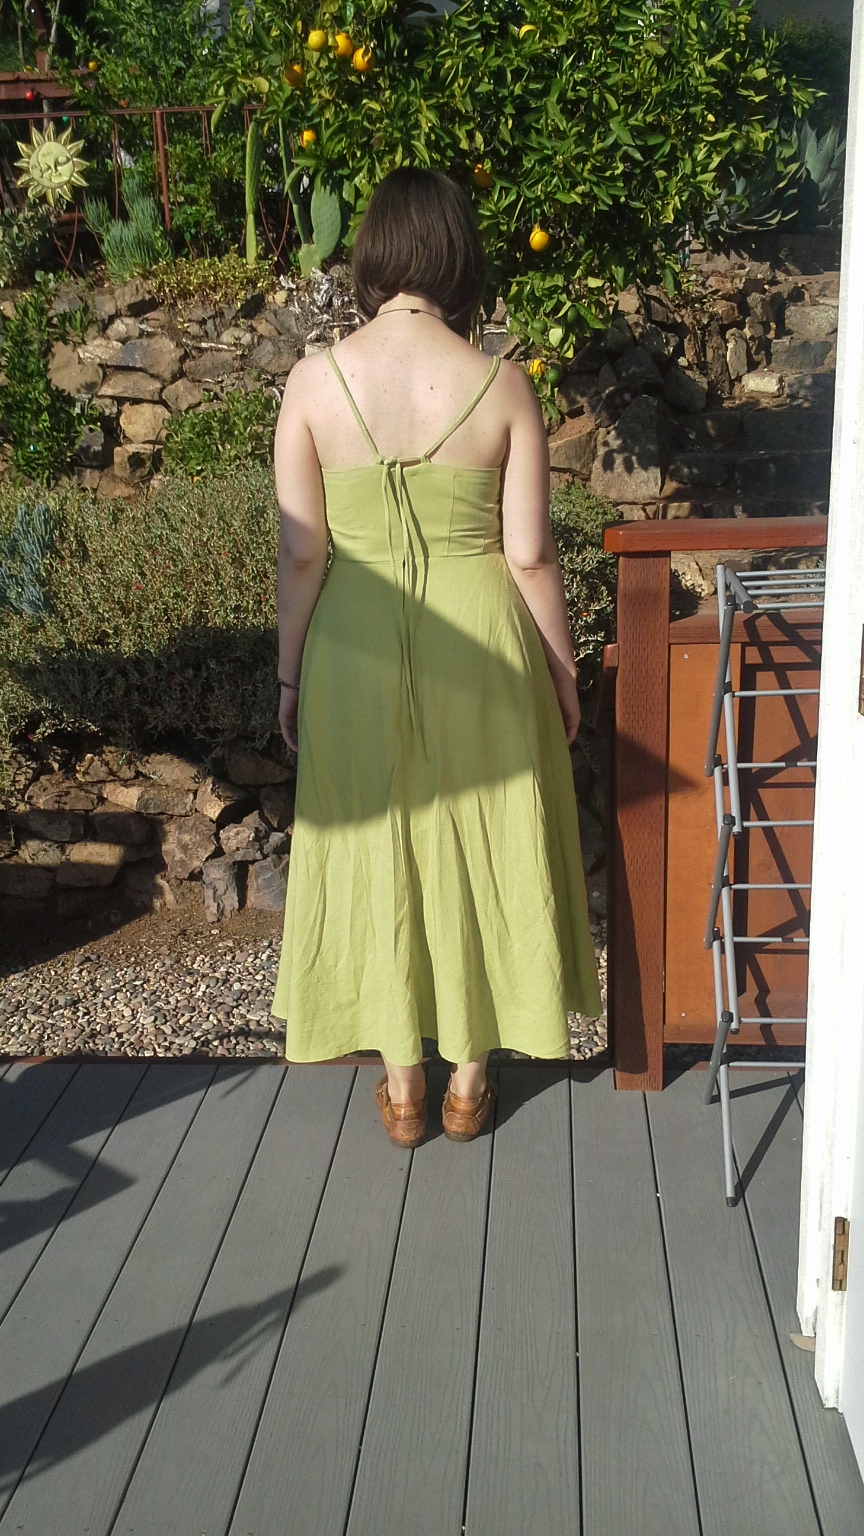
After the pleats are done, the rest is easy. Just sew the sides and shoulders together (right sides together, of course) and finish off the openings how you like.

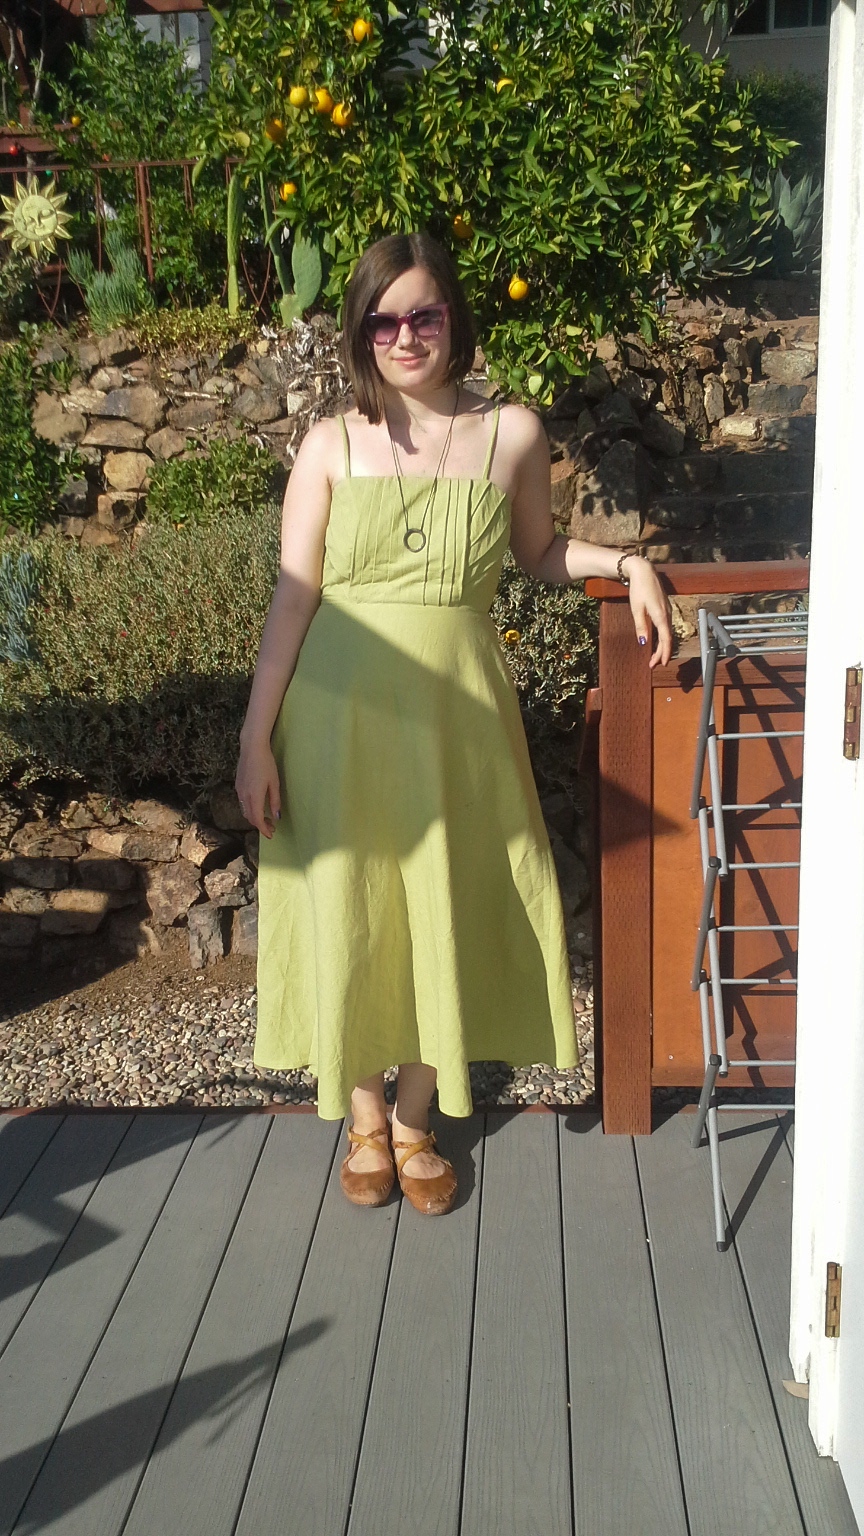
I recommend using light fabrics for this shirt, as they show off the sleeves best. Something see-through could be awesome as well. You’ll need about 1-1,5 m (1,09-1,6 yds) of fabric, depending on whether you choose to cut the back piece on fold or not (and also on the width of the fabric).

So, I hope this makes any sense to anyone. Please bare in mind that I’ve always been rubbish at explaining stuff to others, so I’m really doing the best that I can. Feel free to ask any questions though :)


Tagged , , , ,

I’m new at all this but let’s give it a try anyway.

Ok, so I sew a lot in my free time. And I mean A LOT.

So I said to myself: “Self, start a sewing blog.”

So here we are.

2 Shirts, 1 Skirt

These two are made with the same pattern (which I designed all by myself, with a little inspiration from this vintage pattern http://vintagefashionlibrary.com/inc/sdetail/185).

here's the pattern, the front is a little longer than the back, pleated later to match in length.

Both the fabrics were left over from my late grandma, who was a semi- professional seamstress and had a habit of hoarding huge amounts of fabric.

It’s hard to tell what they’re made of, probably mixes of some sort. I really like the colour of the first one, though it’s not my usual style, a kind of salmony-peachy-pink.

I made this skirt by modifying a basic long a-line skirt pattern. It has a little pleat -detail in the front and is gathered on the side with ribbon.The fabric is a very light-weight wool mix which I fell in love with… I’m thinking of making a dress out of it later.

The skirt is a much darker shade of gray than what it looks like in the close-ups. Anyway the light is kind of crappy in all the photos, so sorry for that. At least I try! :D

Tagged , ,