
I have been a remarkably bad blogger over the summer, and I feel crappy about it, to be blunt. I hate it when bloggers disappear for months, while randomly posting apologies about not posting, and promising a change for the better. Which is exactly what I did. So sorry for that. Not blogging for so long has also made it harder to start again, but here I am!
Now for the grand reason of not posting: my friend’s wedding dress! Followed by another reason for not posting, which was a 2½ week trip to San Diego, where the wedding was held, and where said friend now lives.
The dress itself has a simple and even slightly non-formal look to it, but it’s great. And a perfect match for the bride in question. The groom seemed to like it too, and none of the guests gave me any backhanded compliments or anything, so apparently it wasn’t too controversial for the mostly american audience :D
I promised myself that I would take lots of photos of the process of making the dress, but unfortunately I failed at that, since my schedule ended up being tighter than I expected (as it always does), and I was very stressed out, because making this dress meant a lot to me, since this is the first time a friend of mine got married, not to mention moved so far away. But San Diego is a great place, and I’m sure she’ll do great there. babble babble.
Here’s what I have left of months of work: quick pics from the wedding (complete with anonymous decapitated bride), some rare photos from when things were not done yet, and some drawings.


The wreath was supposed to go all the way around the head, so the veil could have been attached to it neatly from underneath. When it arrived on the wedding day, however, it was a little different, so I had to improvise with attaching the veil, but I think it worked out fine.
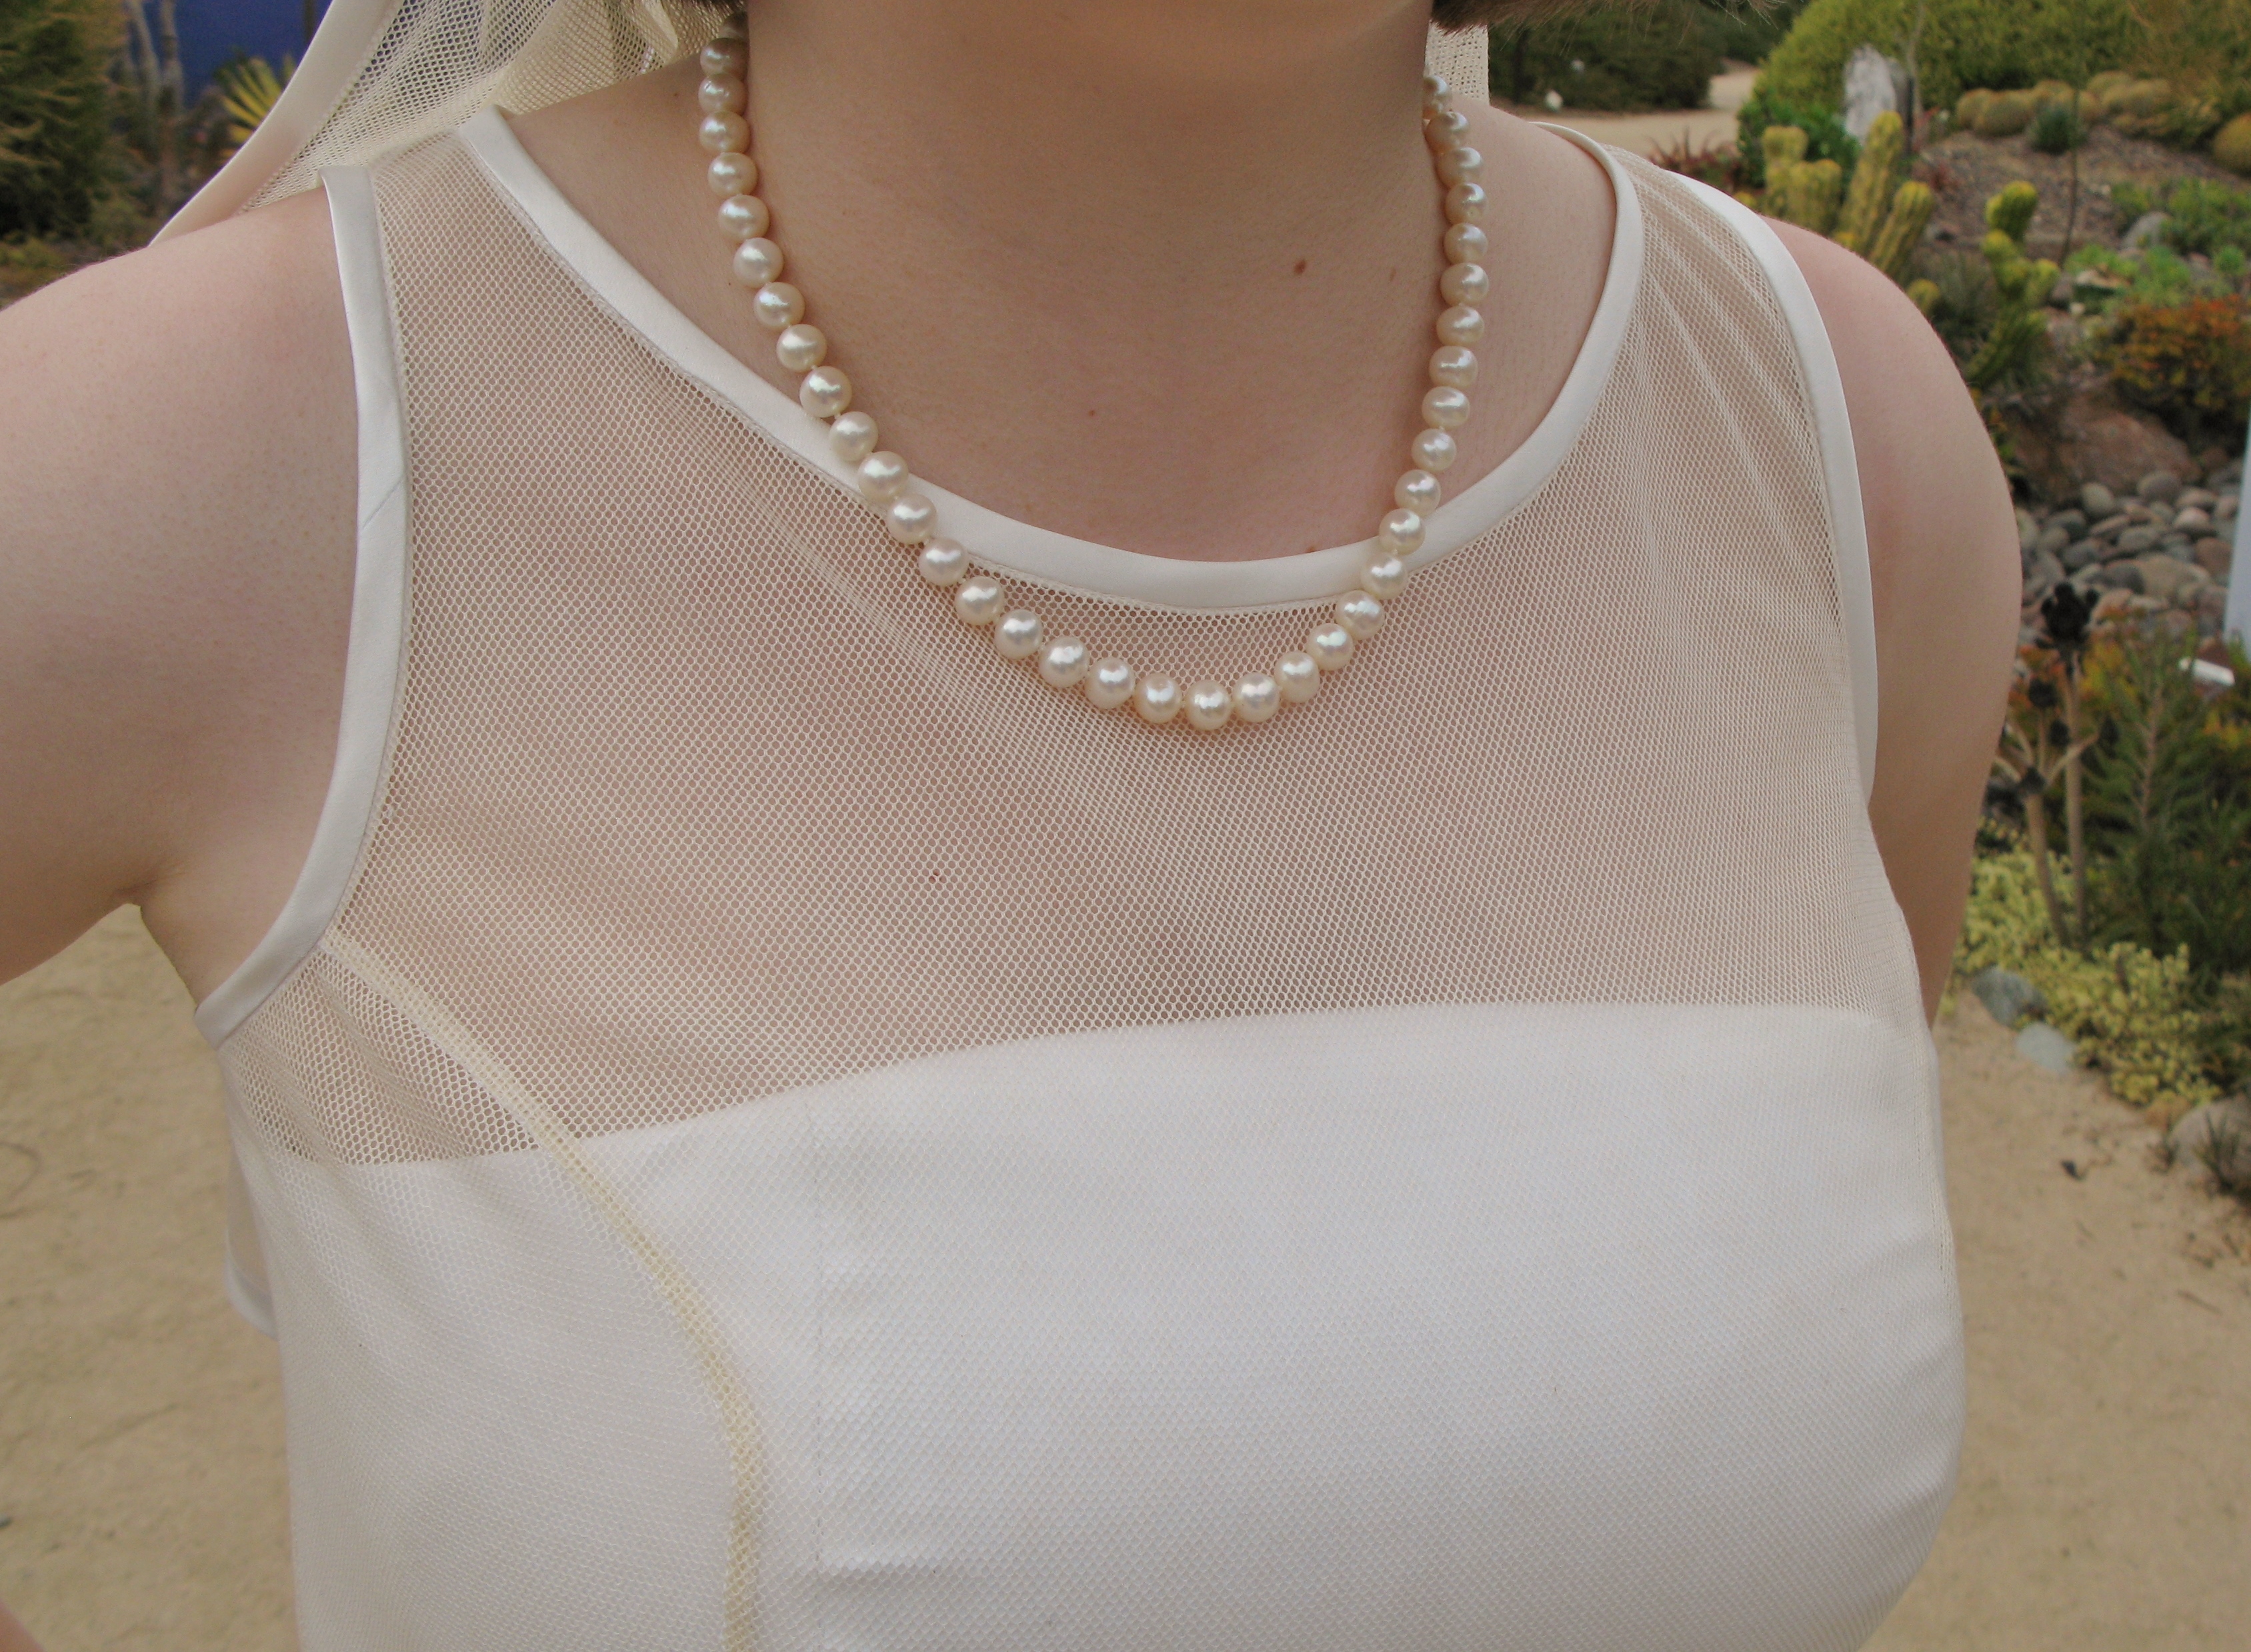
Illusion neckline-thing. Really like this.

Beads at the hem, each one lovingly sewn on by hand :D

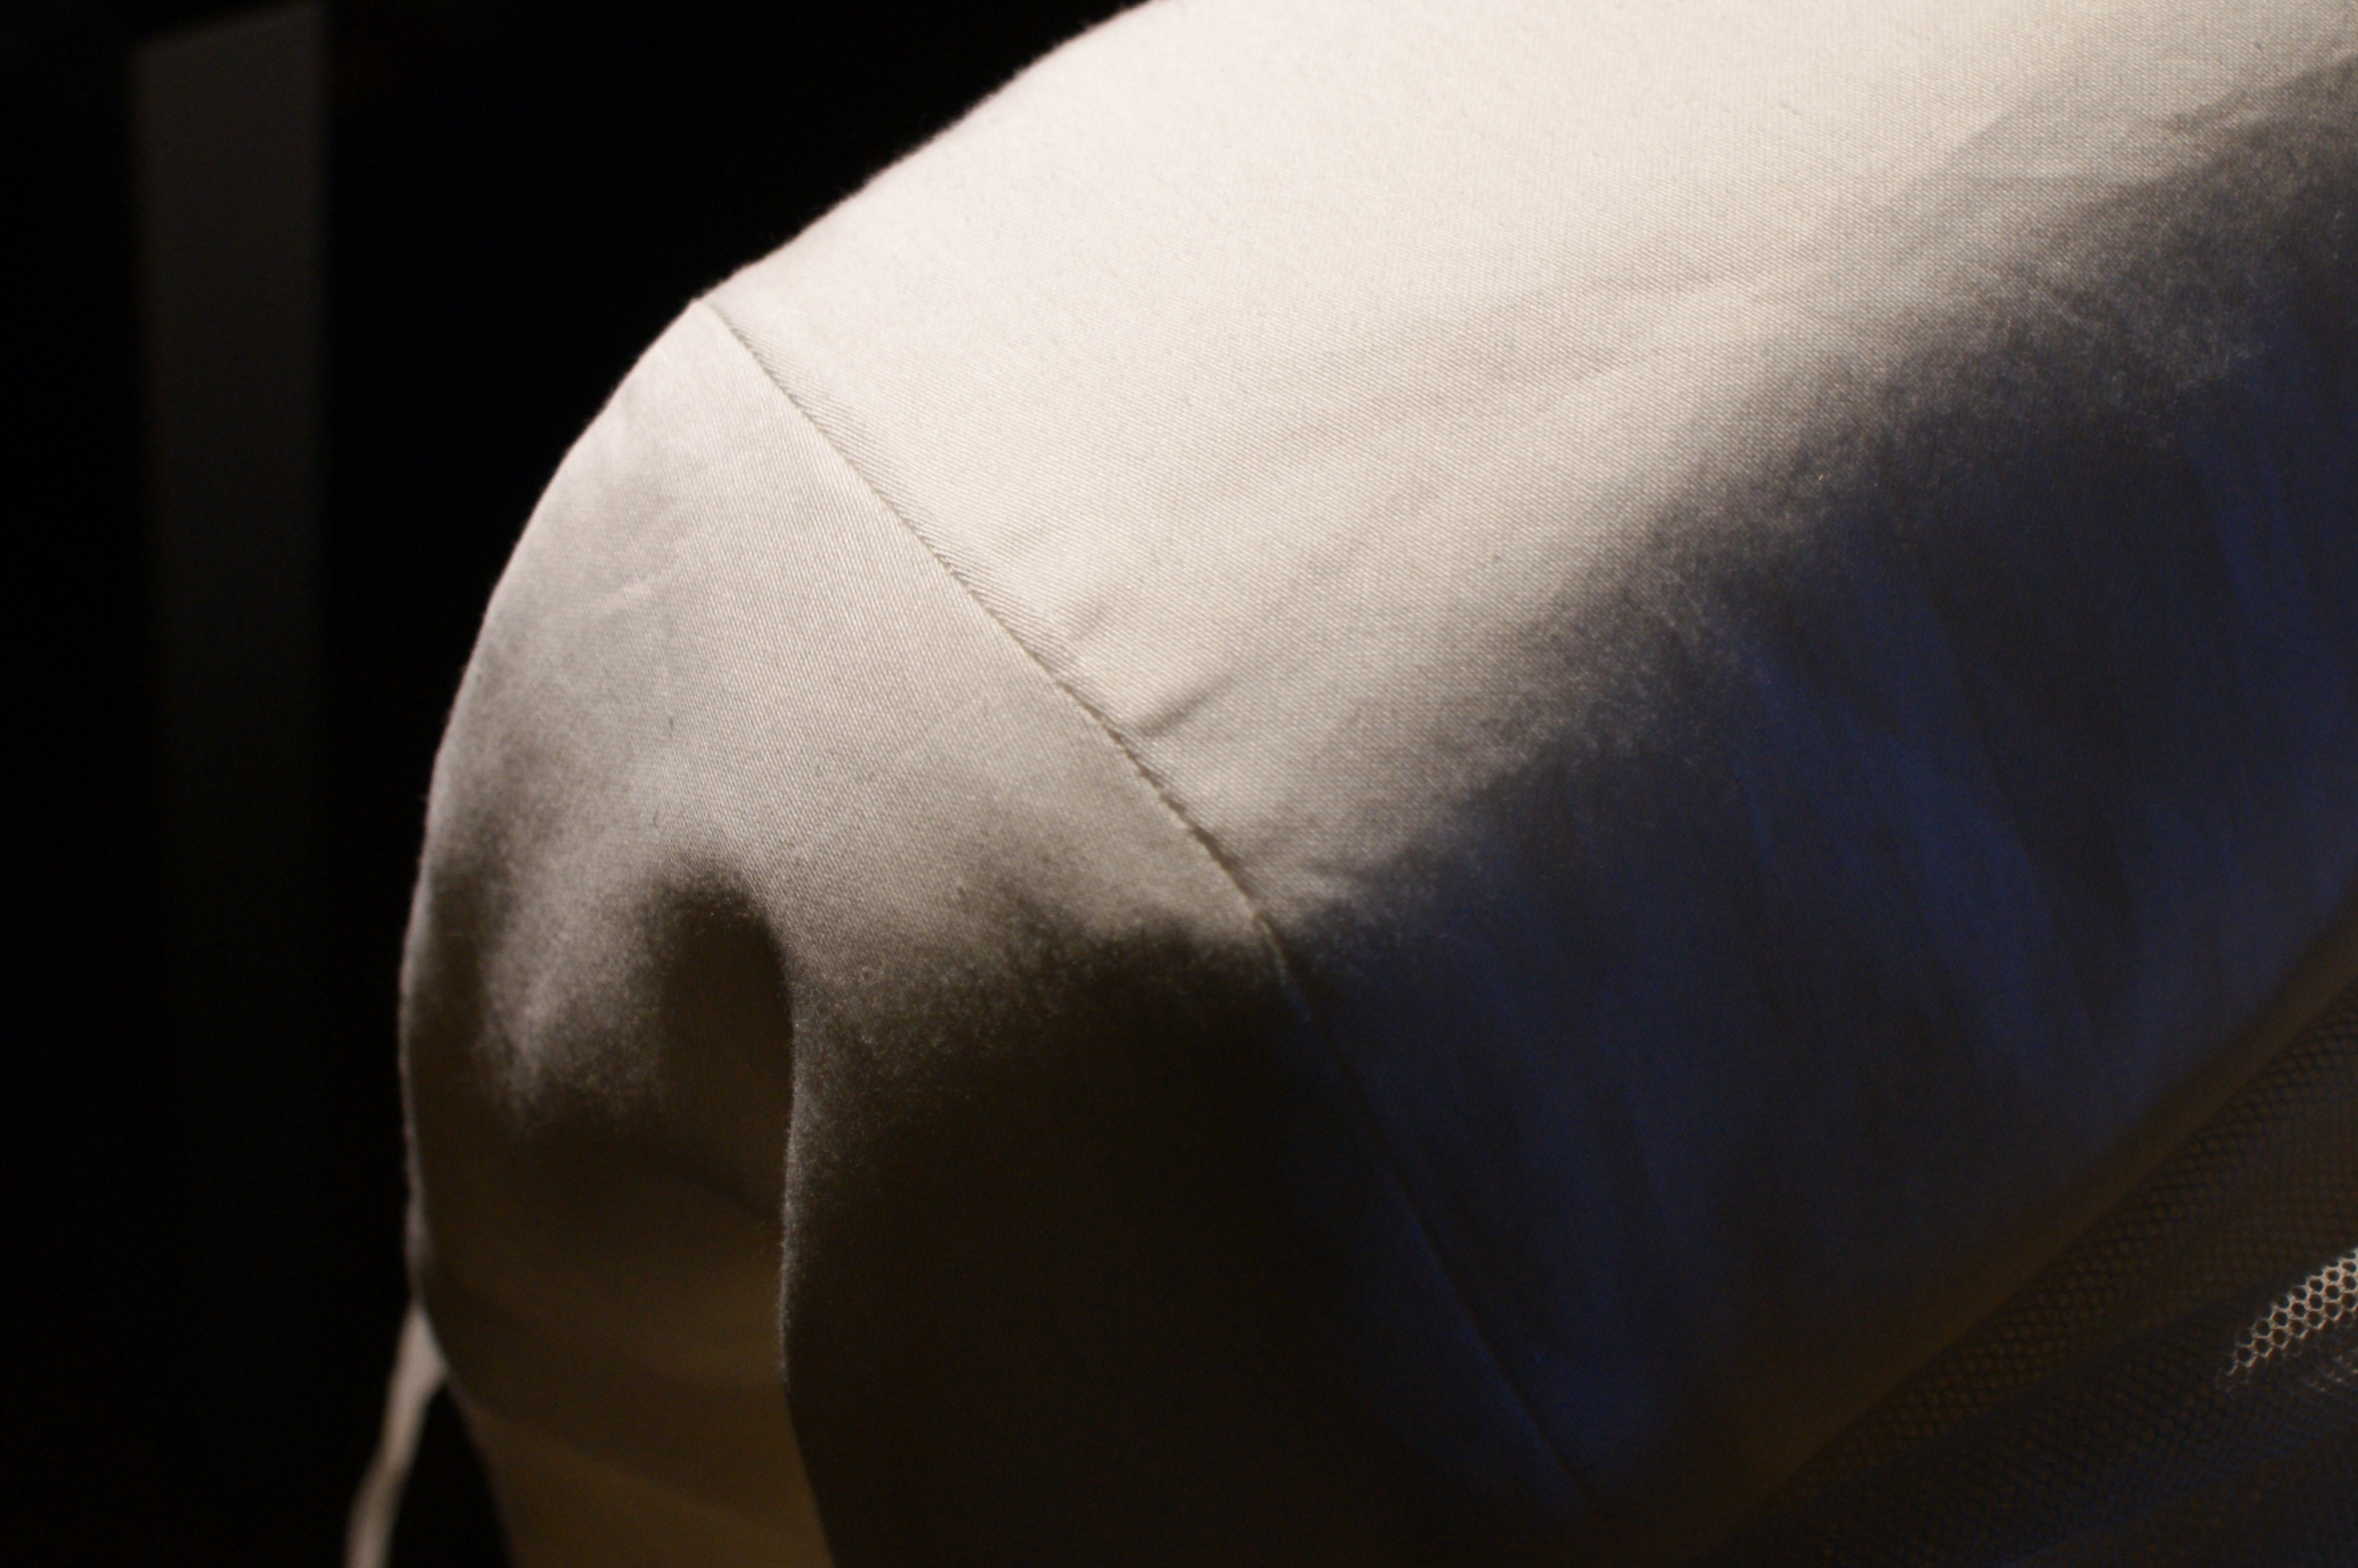
The back was very tricky to handle — getting all the layers to work with the lacing thing was hard to figure out, and it’s not perfect, but still one of my favourite parts of the dress. Especially the little button at the top.
Thoughts on this dress:
The cotton sateen I used for the non-see-through parts should have been thicker, especially with the corset part, since then it would have taken being stretched out a little better = fewer wrinkles along the waist, etc.
Having two hems that are the exact same length is annoying, since in real life they will always go their separate ways from time to time, as you can see from the pictures above.
I should have studied corset making A LOT more before starting this whole thing. It turned out ok, but again, way too thin, and with too few bones in it. I did add one pair that is not shown in the pic below after the dress was almost done, just because the back was wrinkling waaaaay too much there (might’ve been useful to adjust a bit more for a sway back too, but alas, I missed that while fitting the toile). Also, there were/are annoying wrinkles at the front seams, which I’m fairly certain now are due to the centre front piece having too much of a curve at the top. I managed to fix this problem a bit, but there’s only so much you can do to a problem that should have been fixed during the pattern drafting process.

Cotton tulle, which I used for the see-through parts, was really easy to work with, and has a nice look to it too (I bought it here). Also, I think it really added to the overall vintage-feel of the dress. Of course, it wrinkles more than synthetic tulle, but it also has a better drape to it.

I really enjoyed sewing the beads to the hem, bizarrely enough, though it was not a quick process. I might even do some more beading in the future, whenever a little extra formality is required.


The layers of the dress are as follows:
The see-though part
The non-see-through part
a layer of lining the same shape as the previous part
a layer of cotton flannel (added after everything was pretty much done, to counter the fact that the fabric above it was too thin) shaped like this:


The corset with the petticoat attached to it:

And finally a lining to keep the petticoat from directly touching the legs, as it is a little itchy (I used this tutorial to construct the petticoat, by the way).
That’s six layers all in all. Whew.
In the end, I feel nothing but positive feelings towards this dress. It looked very flattering on the bride, she liked it, I like it (despite being terribly neurotic and such), and I learned so much. So, so much. And I just feel so awesome about having had the privilege of making such a dress for such an awesome friend.
And seriously, look at them being all married and stuff:

– Sadie

What an achievement! Well done. Thanks for all the construction details, it’s very interesting to see how you solved the problems.
Thank you! :)